Sopapillas

INGREDIENTS

  • 2 cups all-purpose flour
  • 2 teaspoons baking powder
  • 1 teaspoon salt
  • 2 tablespoons shortening
  • 3/4 cup warm water
  • 1 to 2 cups canola oil for frying

INSTRUCTIONS

  • In a large bowl, sift together flour, baking powder, and salt. Cut in shortening until mixture resembles coarse crumbs. Gradually stir in water just until dough pulls together.
  • Divide dough into 5 pieces. Roll out each piece of dough on lightly floured board into an 8-inch diameter circle. Cut each circle into 4 wedges.
  • Heat oil in a deep frying pan. Add a few of the tortilla wedges at a time. The wedges will puff up. Turn once so they will puff evenly on both sides; then turn back to brown on both sides.
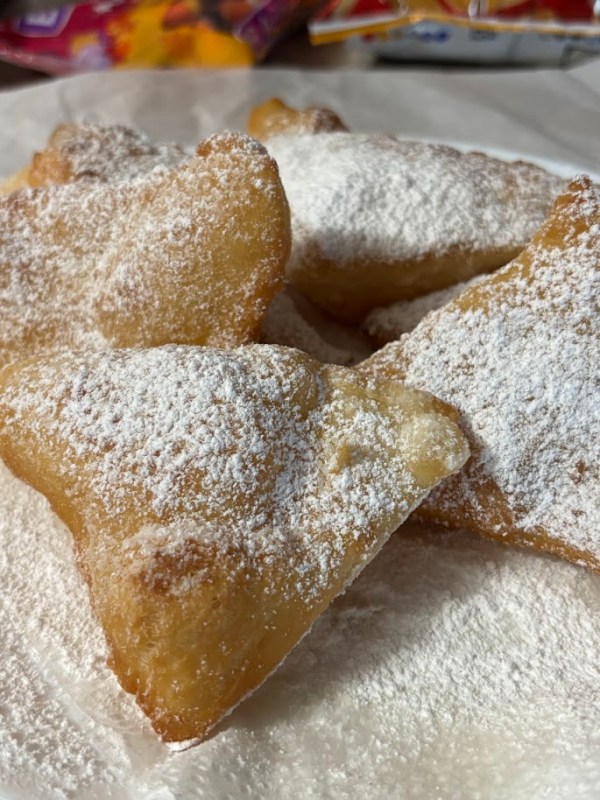
  • Drain on paper towels. While warm, coat each sopaipilla with powdered sugar or cinnamon-sugar, if desired. Serve with honey.

NOTES

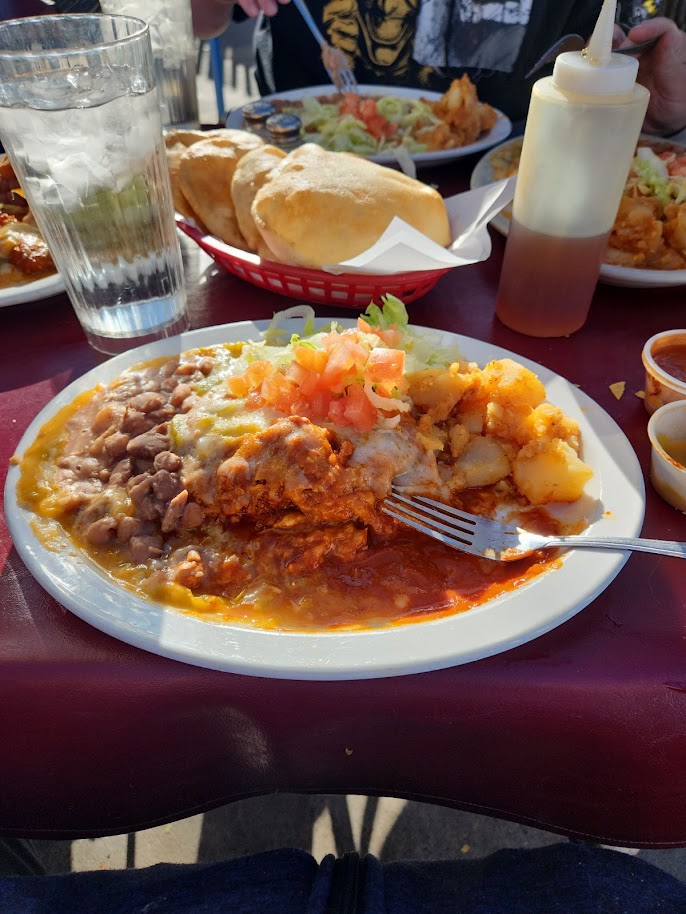
On a road trip to the Grand Canyon, we once stopped at a restaurant in Albuquerque called El Patio de Albuquerque in order to try something local. One Google review said that it was a must to try to adovada as a stuffed sopapilla, and I’m so glad that I did.

When someone asks me what my favorite meal is, I often immediately think of that moment in time. A lot of what makes that meal special is the sentimental circumstances of that moment (sitting on that patio, eating an amazing meal with my brother, my oldest son who was moving soon to another state, and Juno, my new puppy, while enjoying a moment of rest and relaxation during a road trip West to see the Grand Canyon and Sedona via a new camper), but the meal itself was outstanding, especially the warm sopapilla and honey that was served to the table to compliment the meal. One of many, I will be chasing the warmth of that memory for as long as I breathe.


Since then, I found a few recipes for homemade sopapillas, and they hit the spot now and then even though they are never quite as soft and pillowy as those at El Patio de Albuquerque! I hope you enjoy them as well.

The above recipe is from Muy Bueno: Basic Sopaipilla Recipe (New Mexican Sopapillas) – Muy Bueno. Check out their video to get a sneak peek of these beauties:

Grandma Marilyn’s Caramel Corn

INGREDIENTS

  • 8 quarts of popped popcorn (2/3 cups of unpopped popcorn, prepared OR 3 bags of popped microwave popcorn)
  • 1 cup butter
  • 2 cups brown sugar
  • 1/2 cup light Karo corn syrup
  • 1 tsp salt
  • 1 tsp baking soda
  • 1 tsp vanilla (my addition)

INSTRUCTIONS

  • Place popped popcorn in large roasting pan (or aluminum pan)
  • Combine the butter, sugar, Kara, and salt into a medium saucepan. It needs to be enough for the caramel to expand once additional ingredients are added. On medium-high heat, bring ingredients to a boil, and once bubbly, boil for 5 minutes, stirring constantly.
  • Remove from heat and stir in the baking soda. This will expand and become foamy.
  • Add in vanilla, if desired.
  • Pour ingredients over the popcorn and stir to evenly coat. It is okay if it does not cover all the popcorn at this time.
  • Put in a 200 degree oven for one hour, stirring every 15 minutes. The caramel will loosen and cover more popcorn with each stir.
  • While waiting, line counter with parchment paper.
  • Once your hour in the oven is complete, pour cooked caramel corn onto parchment paper and allow to cool.

NOTES

This is your grandmother’s version (see below from the compilation cookbook that was put together after your grandmother’s passing), and it is very similar to the Amish Caramel Corn recipe I always made when you were growing up. I have added a note to add vanilla to make this closer to that recipe. Enjoy!

Audrey’s Favorite Cake Pops

INGREDIENTS

  • 1 freshly baked cake from this recipe (Preppy Kitchen’s Hot Milk Cake) or any box cake mix, if desired
  • 1 package almond bark
  • toppings (sprinkles, etc.)

INSTRUCTIONS

  • Bake this recipe (Preppy Kitchen’s Hot Milk Cake) as instructed. Do not add powdered sugar topping.
  • While still hot, put the insides of the cake into the stand mixer, leaving the very edges that are crispy and brown in pan to snack on later. The tasty edges are the best part anyway!
  • Mix the cake at a low speed until the desired texture is reached.
  • Using a small cookie scoop, form dough into balls and place on a lined baking sheet.
  • Once all dough balls are formed, allow to cool completely.
  • Place cooled cake balls into the fridge while melting your almond bark and gathering toppings.
  • If you have a plastic fork available, remove all but the center tine. This will be used to spear each cake ball for dipping.
  • In a ceramic mug, melt a few almond bark squares at a time in the microwave. Start off with 30 seconds before stirring, and follow up every 10 seconds of microwave time between stirs until the almond bark is melted.
  • Using the single tine on your plastic fork, spear your cold cake ball and dip into melted almond bark to completely cover. Allow excess to drip back into the cup and then place covered cake ball onto prepared baking sheet.
  • Dip the tine back into the almond bark and place a small amount to cover the hole left behind by the fork’s tine. Swirl remaining almond bark on tine to decorate as desired.
  • Immediately use your sprinkles or other toppings to decorate your cake ball as the almond bark will harden quickly.
  • Continue to repeat process until all cake balls are covered.
  • Place covered cake balls into fridge to completely set.
  • Enjoy!

NOTES

I do not use a popsicle stick as with traditional cake pops. We just pop them in our mouths! Just a reminder to make sure that you allow excess almond bark to drip off of cake pops while coating to ensure that the coating is thin or it will be a struggle to eat them. Feel free to use a box cake, if desired. Do note that you may have to use a few spoons full of a complimentary cake icing into batter when using some boxed mixes as they tend to be drier than the homemade cake recommended above. Either way, they will be delicious, I’m sure!


Ritz Peanut Butter Crack Sammies

INGREDIENTS

  • Ritz crackers
  • Almond bark (at least 3 squares)
  • Peanut butter (or spread of your choice such as almond butter, cookie butter, Nutella, melted Rollo, etc.)
  • Toppings of your choice (see notes)

INSTRUCTIONS

  • Decide how many treats you wish to make and make sure you have 2 Ritz crackers for each.
  • Spread peanut butter on half the crackers.
  • Prepare any toppings you may have for easy access is the next steps will have to take place quickly to ensure that the toppings are able to be placed on almond bark coating before it hardens.
  • Melt almond bark and spoon a small circle of warm, liquid almond bark on a parchment paper lined baking sheet.
  • Immediately place the cracker with peanut butter directly on top of the almond bark so that it will form a coating on the cracker for a bottom.
  • Quickly do this for every bottom half of your treats.
  • Once all the peanut butter topped halves have been placed atop their corresponding almond bark circle, place the remaining cracker half on top of the peanut butter to form your cracker sandwich.
  • Using a fork or other utensil, drizzle remaining almond bark on the top of your cracker sandwiches.
  • Immediately top with any toppings you may prefer. For me, that is some honey roasted almonds that I pulse in a blender or food processor, a few sprinkles, and a chocolate chunk or chopped candy bar that I may have on hand.
  • Place in refrigerator to set and then enjoy!

NOTES

This is not so much a recipe than a treat that is made whenever I’m trying to use up leftover almond bark, usually after making Audrey’s Oreo Truffles. The ingredients are never the same … just a mixture of delicious things I have on hand at the time. However, the ingredients pictured (crushed honey roasted almonds, a few sprinkles, and a chopped mini Hershey bar) is one of my favorite combinations! They are addictive and honestly worthy of making on their own, especially for Halloween. See below for how to decorate them for a spooky mummy treat!


Snowball Cookies

INGREDIENTS

  • 1 cup butter, softened (2 sticks)
  • 2/3 cup powdered sugar
  • 2 tsp vanilla extract
  • 0.5 tsp almond extra
  • 2.25 cups all-purpose flour
  • 0.5 tsp salt
  • 2 tbsp cornstarch
  • 1/2 to 3/4 cups chopped pecans
  • Additional powdered sugar to coat cookies (about 1 cup)

INSTRUCTIONS

  • Whip together butter and powdered sugar until light and creamy.
  • Add vanilla and almond extracts to creamed mixture.
  • In another bowl, sift together your dry ingredients: AP flour, salt, cornstarch
  • Add your dry to your creamed ingredients in 3 parts.
  • Fold in your nuts.
  • Put combined dough into fridge for about 30 minutes.
  • Preheat oven to 350 degrees.
  • Once dough is chilled, use a small cookie scoop to place cookie dough balls onto 2 baking sheets lined with parchment paper. Allow at least an inch between cookie but know that they do not really spread. You can fit about 20 cookies on one baking sheet.
  • Bake cookies in preheated oven for about 10 minutes. Cookies will be very blonde. DO NOT TOUCH once removed from oven.
  • Allow cookies to cool for about 10 minutes.
  • Once slightly cooled, place cookies on a cooling rack to finish cooling off completely.
  • Once cookies are completely cooled, coat cookies in additional powdered sugar. Be gentle as they are delicate.
  • Enjoy!

NOTES

Original recipe discovered via TikTok: Angela Kay’s Kitchen. We called these Mexican Wedding Cookies while growing up. They are a fav!

Noah’s Yummy Ooey Gooey Bars

Recipe Highlight:  This is a quick & easy way to satisfy a sweet tooth. Noah makes his own mean version of these bad boys! This is my take on this popular homemade treat that’s sure to please even the most discerning tastebud at the family gathering.

Makes 9 x 13-inch pan of bars.

INGREDIENTS

Crust:

  • box of cake mix (I use French vanilla)
  • 1/2 cup of melted butter (1 stick)
  • 2 eggs
  • vanilla extract to taste

Filling

  • 8 ounces cream cheese (1 block)
  • 2 eggs
  • vanilla extract to taste
  • 4 cups powdered confectioner’s sugar

INSTRUCTIONS

  1. Heat oven to 350 degrees.
  2. Melt butter.
  3. Add your box of cake mix to the melted butter and mix in eggs & vanilla to form a crust mixture.
  4. Press crust mixture into a 9 x 13-inch pan.
  5. In a separate bowl, cream together softened cream cheese (room temperature) with eggs & vanilla. Once mixed, slowly incorporate the powdered sugar, one cup at a time. This will be your topping mixture.
  6. Pour the topping mixture over the crust mixture.
  7. Place into your preheated oven, cooking for 35 to 40 minutes. When done, the middle will be softly set and the top of the bars will have a crinkled texture.
  8. Cool completely before eating.

NOTES

Kiddos: I love you so much! Please feel free to make this your own! I normally use the French vanilla cake mix, but the original calls for yellow cake mix … and lemon or strawberry would be fantastic as well! We always enjoyed putting them in the fridge once cooled as it transforms the topping! No matter how you enjoy them, know I’m thinking of you!

Grandma’s Strawberry Crunch Cake

This is one of our traditional Christmas desserts, one that we’ve had every Christmas as long as I can remember. I even made sure to whip this up while we were in Boston, miles and miles away from our extended family back in Mississippi. It was comforting to share that little piece of home and helped me cope with missing them so very much during the holidays.

I post this here because I think I may be the last of my family to have this recipe. Someone had told me that my grandmother had lost it, and it would break my heart to lose this traditional family favorite.

It’s simple. And beautiful. This red and white delight is a lovely finishing touch to any holiday or spring table. I do hope you’ll try it when you can spare the calories.

INGREDIENTS

Crust:

  • 2 sticks of butter, melted
  • 2 cups of flour
  • 2 cups pecans
  • 2 Tbsp sugar
  • A pinch of salt if using AP flour, optional


FILLING:

  • 2 packages cream cheese, softened
  • 3 cups powdered sugar
  • Box of Dream Whip (located near Jello in baking supplies aisle)
  • 1 can strawberry filling

INSTRUCTIONS

For crust: Place butter into baking dish and melt in a 350-degree oven. Add flour, nuts, and sugar to melted butter, forming a dough. Press the dough into the pan to form a crust and bake in pre-heated oven until golden. Cool.

For filling: Cream together softened cream cheese and powdered sugar. Prepare box of Dream Whip per box instructions (see notes below). Fold Dream Whip into cream cheese mixture. Pour combined mixture into cooled crust and top with strawberries before refrigerating.

Refrigerate for at least 4 hours before serving.

NOTES

Grandma’s recipe just states “box of dream whip”, but the box comes in 2 envelopes. Use both.


French Vanilla Crinkle Cookies

INGREDIENTS

  • French Vanilla box cake mix (or cake mix of your choice)
  • 1/3 cup neutral oil
  • 2 eggs, slightly beaten
  • powdered sugar to roll cookies in for crinkle texture

INSTRUCTIONS

  • Preheat your oven to 350°F (175°C) and line a baking sheet with parchment paper.
  • In a mixing bowl, combine the red velvet cake mix, eggs, and vegetable oil. Stir until a thick dough forms. Chill the dough for about 15-30 minutes to make it easier to handle.
  • Using a cookie scoop or your hands, form the dough into balls (about 1 inch in diameter). Roll each ball in powdered sugar until fully coated. For a better crinkle effect, roll them twice in powdered sugar.
  • Place the cookie balls on the prepared baking sheet, spacing them about 2 inches apart. Bake for 10 to 12 minutes, or until the edges are set but the centers are still soft. The cookies will continue to firm up as they cool.
  • Cool and Enjoy: Allow the cookies to cool on the baking sheet for a few minutes before transferring them to a wire rack to cool completely. Enjoy your delicious red velvet crinkle cookies!

NOTES

These are just typical cake mix cookies, and any flavor cake mix will do. The cake flavor in the preview image is birthday cake flavored, for example. However, there’s something special about using the French Vanilla box mix for these treats. It provides almost a cheesecake-like flavor that is our favorite. Enjoy!

The Perfect Swim Biscuits & Southern-style Chocolate Gravy

The perfect biscuit is such a personal preference. Some people enjoy soft, fluffy biscuits. Some people enjoy a buttery, layered biscuit. And me? I love a biscuit that is somewhere between my mom’s fluffy biscuits and my grandmother’s buttery biscuits with a crispy crust straight from the cast iron. That’s where these easy swim biscuits come in!

INGREDIENTS

Biscuits:

  • 1 stick of butter
  • 2-1/2 cups flour
  • 4 teaspoons baking powder
  • 4 teaspoons sugar
  • 2 teaspoons salt
  • 2 cups of milk

Chocolate Gravy:

  • 3/4 cups sugar
  • 1/4 cups cocoa
  • 3 tablespoons flour
  • 1 tablespoon of butter
  • 2 cups of milk or water
  • pinch of salt (to taste)

INSTRUCTIONS

Biscuits:

  1. Turn on oven to 425 degrees.
  2. Place stick of butter into your cast iron skillet and put into oven as it is heating. Remove from oven when butter is melted (about 10 minutes). I like to leave it in there until the milk solids start turning golden.
  3. In a bowl, combine dry ingredients before adding in milk.
  4. Once butter is melted in iron skillet, drop heaping spoons of dough into the melted butter forming individual biscuits. I usually make around 9 large biscuits.
  5. Swirl your pan a little so that some of the butter also gets on top and in between your biscuits.
  6. Cook in 425-degree oven for about 25 minutes, or until the edges are crispy and the tops are golden brown.

Chocolate Gravy:

  1. Sift dry ingredients together into a saucepan.
  2. Slowly incorporate water or milk into dry ingredients. (My mom used water instead of milk!)
  3. Heat at medium heat, stirring frequently, until the mixture is combined (no lumps!) and has thickened to a gravy consistency.
  4. Finish with a tab of butter (and some people add a touch of vanilla, but this was not traditional in our house growing up).

NOTES:

While it is trendy now to call this chocolate gravy and biscuits, these were just “chocolate biscuits” to us when growing up. This treat is a staple for any weekend country breakfast. Since Zach doesn’t like chocolate biscuits, make sure you also make a quick & tasty sausage milk gravy to top those swim biscuits! Add grits and a side of bacon … and you’re home. I love you, kiddos!

Lacey Almond Thin Cookie Recipe

I originally found this recipe listed as Wedding Cookies, but the results were not what I normally associate as such. These cookies more closely resemble a lacey Almond Thin. I feel like the original recipe author perhaps forgot an ingredient when posting (an egg, maybe?), but the results were these rich, thin cookies that became my favorite contribution to the Christmas cookie season.

Let the baking madness that is a hallmark of Christmas begin!

Also: These are AMAZING cold. I’m talking straight-out-of-the-freezer cold! Trust me on this one …

INGREDIENTS

  • 1 cup sugar
  • 1/2 cup butter, softened
  • 3 ounces of cream cheese
  • 1 teaspoon vanilla
  • 1/8 teaspoon almond extract
  • 1 cup flour
  • pinch of salt

INSTRUCTIONS

  • Cream together the first 5 ingredients.
  • Fold the flour and pinch of salt into the creamed mixture.
  • Place dough into fridge to chill for 30 minutes while heating oven to 350 degrees.
  • Using a small cookie scoop, place 8 dough balls evenly spaced onto ungreased cookie sheet.
  • Place cookies into a 350-degree oven for 14-18 minutes (or until golden brown).
  • Cookies will be spread when cooking and become VERY delicate. They are done when edges are lacey and golden brown. I like the edges very lacey and messy as the crunch is spectacular.
  • Allow to cool almost completely before coating with powdered sugar.
  • Store cooled cookies in fridge (or freezer!) until serving.

This recipe makes about 16 cookies.

Create a website or blog at WordPress.com

Up ↑