Apple Jelly Cake

INGREDIENTS

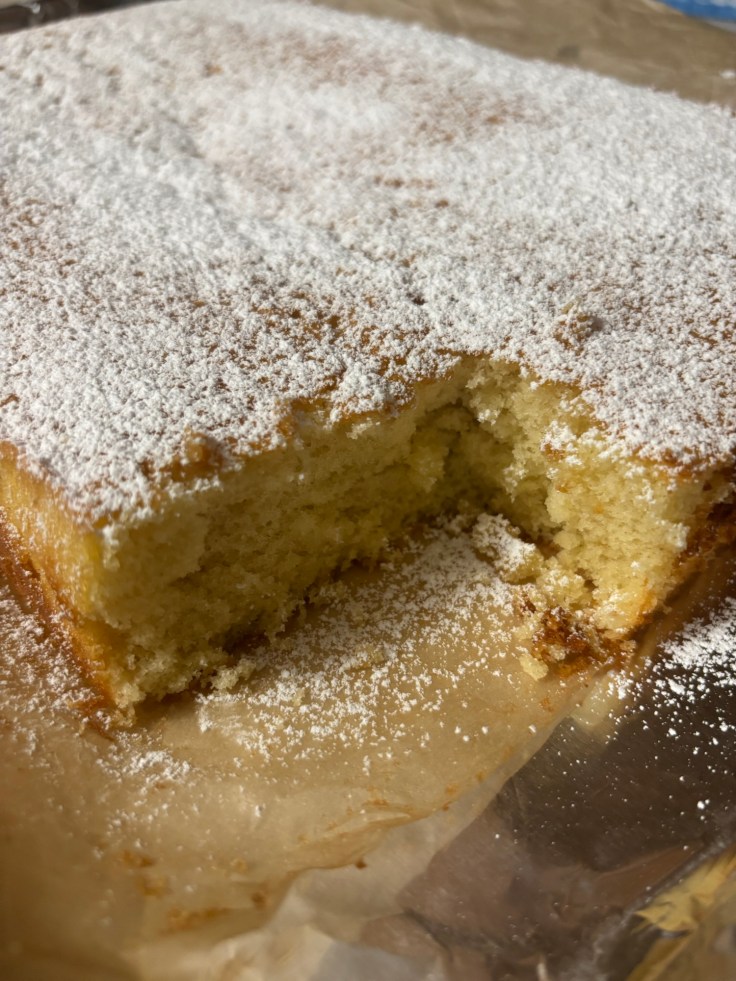
  • Any moist and delicious yellow cake baked into 2 rounds
  • 1 large jar of apple jelly (18 oz)
  • 2/3 cup sugar

INSTRUCTIONS

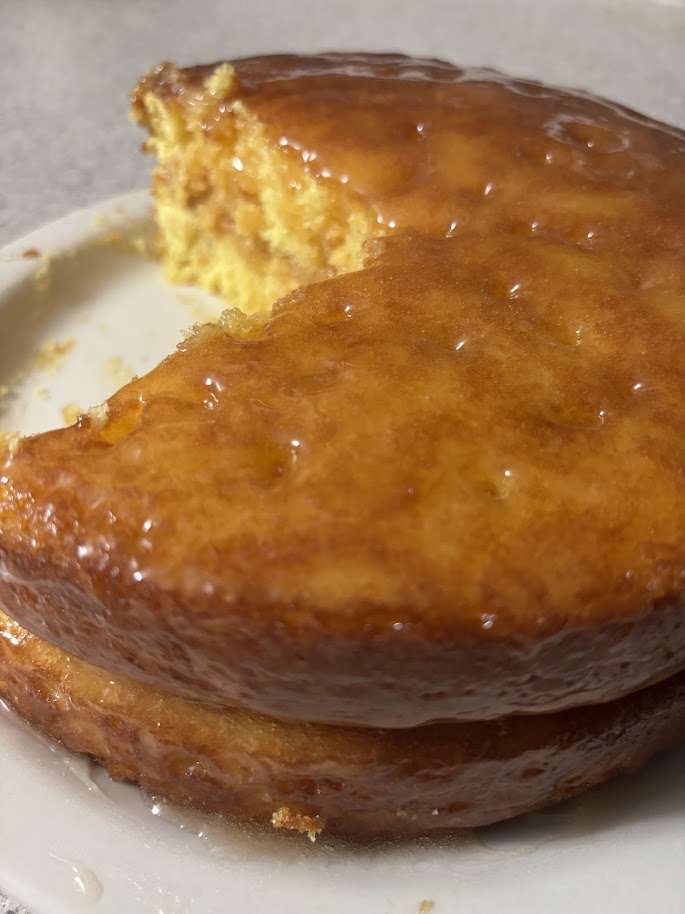
  • Once your yellow cake is prepared and cooled enough to handle (but still warm), prepare your “icing” by combining one large jar of apple jelly (18 ounces) with 2/3 cup sugar. Mix until combined.
  • Poke holes in the tops of both layers of cake.
  • Place one layer of the cake onto your serving plate. Slather top with jelly icing, making sure to get into the holes of the cake before frosting sides.
  • Place the top layer of the cake on previous layer and slather the top with jelly icing as well, making sure to get into the holes of the cake before frosting sides. There should be enough jelly mixture to be really generous but reserve enough of the jelly icing for a second coat.
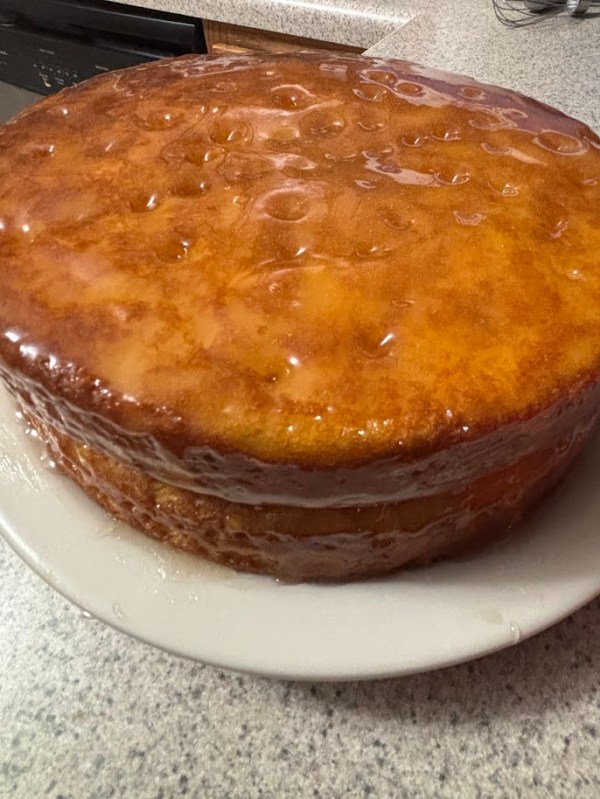
  • Allow cake to completely cool and add the remaining jelly onto the top of the cake, focusing on filling the holes as much as possible.
  • Enjoy!

NOTES

This is an old-fashioned cake that a co-worker used to talk about with fondness. I made it one day, and it become one of our favorites. Zach has requested this cake often for his birthdays instead of a traditional cake with buttercream icing. We have also tried this same method with different cakes and jellies, namely a white cake with blackberry. It was also delicious!


Audrey’s Favorite Cake Pops

INGREDIENTS

  • 1 freshly baked cake from this recipe (Preppy Kitchen’s Hot Milk Cake) or any box cake mix, if desired
  • 1 package almond bark
  • toppings (sprinkles, etc.)

INSTRUCTIONS

  • Bake this recipe (Preppy Kitchen’s Hot Milk Cake) as instructed. Do not add powdered sugar topping.
  • While still hot, put the insides of the cake into the stand mixer, leaving the very edges that are crispy and brown in pan to snack on later. The tasty edges are the best part anyway!
  • Mix the cake at a low speed until the desired texture is reached.
  • Using a small cookie scoop, form dough into balls and place on a lined baking sheet.
  • Once all dough balls are formed, allow to cool completely.
  • Place cooled cake balls into the fridge while melting your almond bark and gathering toppings.
  • If you have a plastic fork available, remove all but the center tine. This will be used to spear each cake ball for dipping.
  • In a ceramic mug, melt a few almond bark squares at a time in the microwave. Start off with 30 seconds before stirring, and follow up every 10 seconds of microwave time between stirs until the almond bark is melted.
  • Using the single tine on your plastic fork, spear your cold cake ball and dip into melted almond bark to completely cover. Allow excess to drip back into the cup and then place covered cake ball onto prepared baking sheet.
  • Dip the tine back into the almond bark and place a small amount to cover the hole left behind by the fork’s tine. Swirl remaining almond bark on tine to decorate as desired.
  • Immediately use your sprinkles or other toppings to decorate your cake ball as the almond bark will harden quickly.
  • Continue to repeat process until all cake balls are covered.
  • Place covered cake balls into fridge to completely set.
  • Enjoy!

NOTES

I do not use a popsicle stick as with traditional cake pops. We just pop them in our mouths! Just a reminder to make sure that you allow excess almond bark to drip off of cake pops while coating to ensure that the coating is thin or it will be a struggle to eat them. Feel free to use a box cake, if desired. Do note that you may have to use a few spoons full of a complimentary cake icing into batter when using some boxed mixes as they tend to be drier than the homemade cake recommended above. Either way, they will be delicious, I’m sure!


Hot Milk Cake

Original recipe: Hot Milk Cake – Preppy Kitchen

INGREDIENTS

  • 1 cup whole milk (240mL)
  • ½ cup unsalted butter (113g)
  • 2 cups all-purpose flour (240g)
  • 2 teaspoons baking powder
  • ½ teaspoon salt
  • 2 cups granulated sugar (400g)
  • 4 large eggs
  • 1½ teaspoons vanilla extract
  • Powdered sugar for dusting

INSTRUCTIONS

  • Preheat the oven to 350°F. Grease a 9×13-inch baking pan with baking spray.
  • Heat the milk and butter in a small saucepan, stirring occasionally, just until bubbling and butter is melted, about 5 minutes.
  • Meanwhile, in a medium bowl, whisk together the flour, baking powder, and salt. Set aside.
  • In a large mixing bowl or the bowl of a stand mixer fitted with a paddle attachment, beat the granulated sugar and eggs on medium-high until fluffy, 3 to 4 minutes. Add the flour mixture and beat on low until just incorporated. With the mixer running on low, gradually pour in the hot milk mixture. Stir in vanilla extract. Pour batter into the prepared baking pan.
  • Bake for 28 to 32 minutes or until lightly browned, and a toothpick inserted in the center comes out clean. Let the cake cool completely in the pan on a wire rack. Dust the cake with powdered sugar before slicing and serving.

NOTES

Please go to the linked original recipe or watch the embedded video below for detailed instructions regarding this amazing cake. I am copy/pasting for posterity’s sake, but the step-by-step instructions are recipe specific details provided in the original recipe are so important to understanding the magic of this recipe.

According to Zach, this is his favorite cake. It is also the cake that I use to make my cake pops. It is a great way to use up milk that is going to expire soon. There’s something so perfect about the crumb and the outer edges of this cake … and so simple with its coating of powdered sugar instead of icing. I will never tire of it!


Grandma’s Strawberry Crunch Cake

This is one of our traditional Christmas desserts, one that we’ve had every Christmas as long as I can remember. I even made sure to whip this up while we were in Boston, miles and miles away from our extended family back in Mississippi. It was comforting to share that little piece of home and helped me cope with missing them so very much during the holidays.

I post this here because I think I may be the last of my family to have this recipe. Someone had told me that my grandmother had lost it, and it would break my heart to lose this traditional family favorite.

It’s simple. And beautiful. This red and white delight is a lovely finishing touch to any holiday or spring table. I do hope you’ll try it when you can spare the calories.

INGREDIENTS

Crust:

  • 2 sticks of butter, melted
  • 2 cups of flour
  • 2 cups pecans
  • 2 Tbsp sugar
  • A pinch of salt if using AP flour, optional


FILLING:

  • 2 packages cream cheese, softened
  • 3 cups powdered sugar
  • Box of Dream Whip (located near Jello in baking supplies aisle)
  • 1 can strawberry filling

INSTRUCTIONS

For crust: Place butter into baking dish and melt in a 350-degree oven. Add flour, nuts, and sugar to melted butter, forming a dough. Press the dough into the pan to form a crust and bake in pre-heated oven until golden. Cool.

For filling: Cream together softened cream cheese and powdered sugar. Prepare box of Dream Whip per box instructions (see notes below). Fold Dream Whip into cream cheese mixture. Pour combined mixture into cooled crust and top with strawberries before refrigerating.

Refrigerate for at least 4 hours before serving.

NOTES

Grandma’s recipe just states “box of dream whip”, but the box comes in 2 envelopes. Use both.


Delicious Strawberry & Cream Cheese Cobbler

Recipe Highlight: This is one of my kids’ favorites! While some request chocolate for Valentine’s Day, my kiddos request this comforting cobbler.


Link: https://preppykitchen.com/strawberry-cobbler/


Please click on the link above for the original recipe.

If you use the recipe below, let me know how you feel about these changes!

INGREDIENTS:

For strawberries:

  • 2 pounds fresh strawberries hulled and halved
  • 1/2 cup granulated sugar

For cobbler:

  • 9 tablespoons unsalted butter 
  • 2/3 cup sugar
  • 2¼ cup all-purpose flour 
  • 2½ teaspoons baking powder
  • 1¼ cup milk 
  • 2 teaspoons vanilla extract
  • ½ teaspoon kosher salt

For cream cheese filling:

  • 1 block of cream cheese
  • 1/2 cup of powdered sugar
  • 2 teaspoons of vanilla extract

INSTRUCTIONS:

  • Preheat the oven to 350°F.
  • In a large bowl, stir together the strawberries and 1/2 cup of sugar. Set aside to macerate.
  • Add the butter to a 13×9-inch baking dish and place in the preheated oven until the butter is melted, about 10 minutes.
  • Meanwhile, in a medium mixing bowl, whisk together the flour, baking powder, salt, and 2/3 cup of sugar. Add the milk and vanilla extract. Stir just until combined. Set aside.
  • Using a mixer, cream together the block of cream cheese, 1/2 cup of powdered sugar, and 2 teaspoons of vanilla. Set aside.
  • Carefully remove the baking dish from the oven and pour the batter over the melted butter. Next add the cream cheese mixture by heaping tablespoons to the top of your batter. Finally, spoon the juicy strawberries over the batter dotted with cream cheese.
  • Bake for 55 to 60 minutes or until the batter is golden brown and the strawberry juices are bubbling. In the last 15 minutes or so, sprinkle with turbinado sugar for texture, if desired.
  • Let cool for 15 minutes.

NOTES:

The cream cheese filling is an over-the-top addition that my kids loved, but it is entirely optional! It is delicious, regardless! I will continue to update recipe as I tweak here and there.

Kiddos: I love you so much, and I hope you think of me when you make this in your own kitchen.

Create a website or blog at WordPress.com

Up ↑