Audrey’s Banana Bread

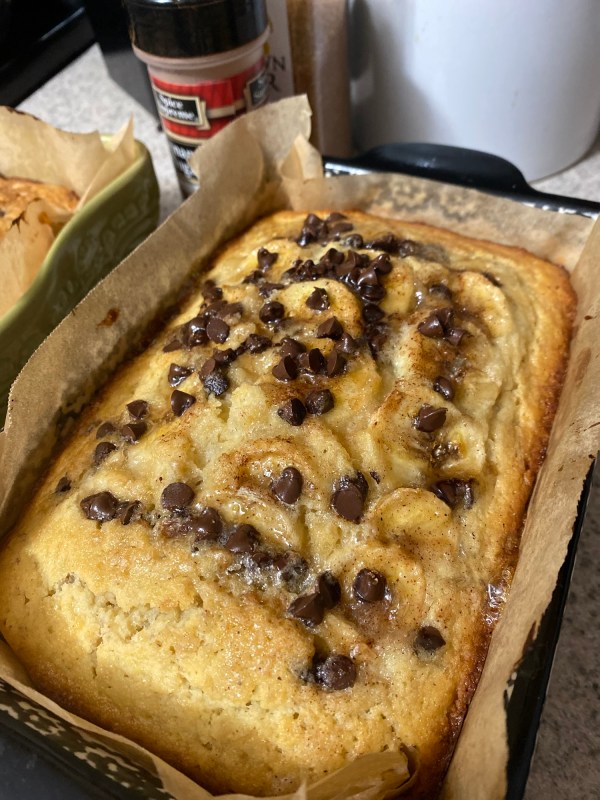
Recipe Highlight: This is a family favorite, especially beloved by my darling daughter. I will forever cherish the memory of making this sweet treat in the kitchen with her at my side. If you’re reading this, my sweet baby girl, add more chocolate chips …

Makes two 9-inch loaf pans

INGREDIENTS

  • 7 large bananas, very ripe (reserve 1 banana to slice/decorate the top loaves before baking)
  • 1/2 cup butter (8 TBSP), softened
  • 1/2 cup coconut oil (can sub butter or shortening)
  • 1.5 cups granulated sugar
  • 4 eggs, lightly beaten
  • 1 tsp vanilla (I use a dollop of vanilla paste and a tsp of vanilla … measure with your heart)
  • pinch of salt
  • 3 cups self-rising flour (*see notes if using All Purpose flour)
  • 1/2 cup chocolate chips (reserve some to top your loaves before cooking)
  • 1/2 cup white chocolate chips (can use milk or semi-sweet instead, if unavailable)
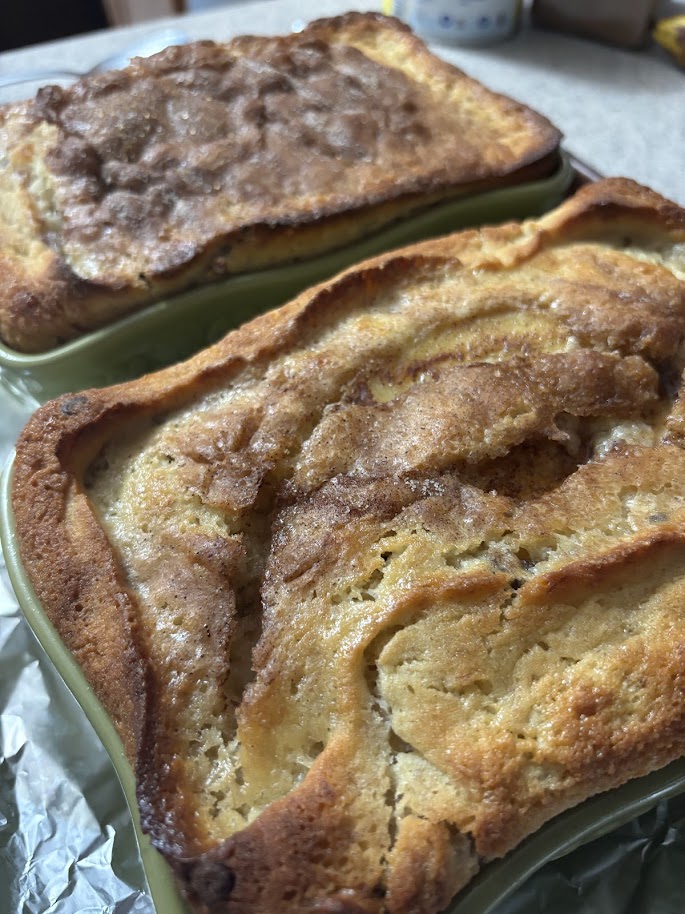
  • cinnamon sugar to sprinkle on top of loaves
  • turbinado sugar to sprinkle on top of loaves

INSTRUCTIONS

  1. Heat oven to 350 degrees.
  2. Add 6 ripe bananas to mixing bowl and use the lowest setting to mash (or use a fork and do so by hand).
  3. Add the butter, coconut oil, sugar, eggs, vanilla, and pinch of salt to the mixing bowl and mix just until combined. Do not overmix.
  4. Add flour and mix, just until combined. Again, avoid overmixing.
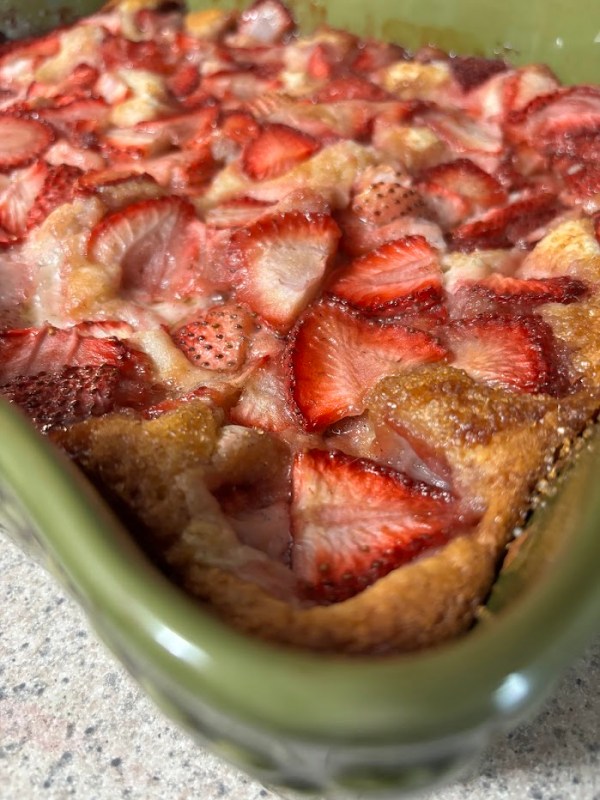
  5. Gently fold in your mix-ins. The recipe calls for walnuts and raisins, but we always used a blend of chocolate chips.
  6. Pour into loaf pans lined with parchment paper.
  7. Decorate the top of the filled loaf pans with remaining sliced bananas and sprinkle with additional chocolate chips, cinnamon sugar, and turbinado sugar (or any combination thereof … just use what you’ve got)
  8. Bake at 350 degrees for 50-60 minutes.

NOTES

*If using All Purpose flour, add 2 tsp baking soda, 1 tsp salt to achieve the results of self-rising flour

Banana bread is a budget-friendly recipe that is meant to use up any browning bananas that just happens to be damned delicious and worthy of making any day of the week. As such, it is meant to be something you should feel free to experiment with, using whatever ingredients you have on hand. Beyond the basic recipe, mix-ins are options … as are the combinations of fats or toppings. Follow your hearts and make it your own.

Noah, Zach & Audrey: I love you all dearly. I will always remember the way you all hyped me up whenever I made something you truly loved in the kitchen. I couldn’t ask for better cheerleaders.


Delicious Strawberry & Cream Cheese Cobbler

Recipe Highlight: This is one of my kids’ favorites! While some request chocolate for Valentine’s Day, my kiddos request this comforting cobbler.


Link: https://preppykitchen.com/strawberry-cobbler/


Please click on the link above for the original recipe.

If you use the recipe below, let me know how you feel about these changes!

INGREDIENTS:

For strawberries:

  • 2 pounds fresh strawberries hulled and halved
  • 1/2 cup granulated sugar

For cobbler:

  • 9 tablespoons unsalted butter 
  • 2/3 cup sugar
  • 2¼ cup all-purpose flour 
  • 2½ teaspoons baking powder
  • 1¼ cup milk 
  • 2 teaspoons vanilla extract
  • ½ teaspoon kosher salt

For cream cheese filling:

  • 1 block of cream cheese
  • 1/2 cup of powdered sugar
  • 2 teaspoons of vanilla extract

INSTRUCTIONS:

  • Preheat the oven to 350°F.
  • In a large bowl, stir together the strawberries and 1/2 cup of sugar. Set aside to macerate.
  • Add the butter to a 13×9-inch baking dish and place in the preheated oven until the butter is melted, about 10 minutes.
  • Meanwhile, in a medium mixing bowl, whisk together the flour, baking powder, salt, and 2/3 cup of sugar. Add the milk and vanilla extract. Stir just until combined. Set aside.
  • Using a mixer, cream together the block of cream cheese, 1/2 cup of powdered sugar, and 2 teaspoons of vanilla. Set aside.
  • Carefully remove the baking dish from the oven and pour the batter over the melted butter. Next add the cream cheese mixture by heaping tablespoons to the top of your batter. Finally, spoon the juicy strawberries over the batter dotted with cream cheese.
  • Bake for 55 to 60 minutes or until the batter is golden brown and the strawberry juices are bubbling. In the last 15 minutes or so, sprinkle with turbinado sugar for texture, if desired.
  • Let cool for 15 minutes.

NOTES:

The cream cheese filling is an over-the-top addition that my kids loved, but it is entirely optional! It is delicious, regardless! I will continue to update recipe as I tweak here and there.

Kiddos: I love you so much, and I hope you think of me when you make this in your own kitchen.

Mom’s Homemade Corn Flake Candy: A Pantry-Friendly Treat

Mom always had ingredients for this snack on hand, especially during leaner times! It’s a cheap fix for any sweet tooth not watching their waistlines! I post this here, not simply for posterity’s sake, but because not doing so would be criminal! It’s a family favorite.

INGREDIENTS

  • 1 cup sugar
  • 1 cup light Karo syrup
  • 1 cup peanut butter (chunky or creamy … your choice!)
  • 5 cups of corn flakes

INSTRUCTIONS

Bring sugar and Karo syrup to a boil in a large sauce pot. Once boiling, add peanut butter. Bring back to a boil and then cook for 1 minute. Remove from heat and add corn flakes, stirring until coated. Quickly spread mixture onto a counter lined with parchment paper. Cool. Break into pieces before storing.

NOTES

The time on the stove before adding the peanut butter is going to be what determines the texture of the candy. A crispier texture is achieved by adding extra time to the boil before adding in peanut butter. My family always prefers it on the chewier side, so the peanut butter is added ASAP upon boiling and timed to one minute on heat exactly once the peanut butter is added.

Enjoy, kiddos!

Mom’s Crispy Oatmeal Cookies: A Timeless Treat

Memories …

Lunchbox treats. Afternoon snacks. Offerings to Santa.

These cookies are a warm embrace.

My mother would make these for many occasions, and every time I nibble one of these delicious, crispy oatmeal cookies, I am immediately transported to my childhood. When making this recipe, I can see my mom’s delicate handwriting in her little yellow recipe notebook, the well-worn pages marked by messy fingertips.

This recipe is a treasure.

These cookies are my youngest son’s favorite, and I hope that all of my children will have the same sensory memories that I share of my dearly departed mother whenever I smell these baking in the oven.

Noah, Zach, and Audrey? I love you so much.

350 degree oven / Ungreased Cookie Sheet

INGREDIENTS

  • 1 cup shortening
  • 1 cup sugar
  • 1 cup brown sugar
  • 2 eggs
  • 1 teaspoon vanilla
  • 1-1/2 cups self-rising flour
  • 3 cups quick cooking oats
  • 1/2 cup finely chopped pecans, if desired (and we never did)

INSTRUCTIONS

Cream shortening, sugars, egg and vanilla. Mix the dry ingredients together in a bowl and then slowly introduce to the creamed mixture until well combined. Add in the oatmeal (and nuts, if desired).

Divide the dough in half, placing half of the dough onto a sheet of parchment paper or foil, rolling each dough into a log and wrapping tightly. Cookies can be baked immediately or frozen.

When ready to bake, slice cookie dough into thin slices, placing each slice on a parchment lined baking sheet. Cook at 350 for 8 – 10 minutes. Cookies will be done when the edges become slightly golden brown. Remove from cookie sheet immediately and let cool on a wire rack.

NOTES

These are old-fashioned cookies that will bake flat and crispy (akin to the Tate’s brand) instead of thick and cakey (Crumbl, for example).

We prefer our cookies slightly underbaked, golden crispy edges with a soft, chewy center. This is around the 8-minute mark with most ovens. Once removed from the oven, I finish the warm cookies with a sprinkle of Maldon flake salt for the satisfying, salty crunch!

… and don’t forget a tall glass of milk.

Have a favorite oatmeal cookie recipe? Please share!

Old-Fashioned Chocolate Chipper Cookie Recipe

Memories …

Lunchbox treats. Afternoon snacks. Offerings to Santa.

These cookies are a warm embrace.

My mother would make these for many occasions and every time I nibble one of these delicious, crispy chocolate chip cookies I am immediately transported to my childhood. When researching this recipe, it looks like it was originally published in the Joy of Cooking Cookbook, of which my mom was certainly a fan.

These have since found a place in my own home, and I hope that my children will have the same sensory memories that I share of my dearly departed mother whenever I smell these baking in the oven.

Noah, Zach, and Audrey? I love you so much.

375 degree oven / Greased Cookie Sheet

INGREDIENTS

  • 1/2 cup shortening
  • 1/2 cup sugar
  • 1/4 cup brown sugar
  • 1 egg
  • 1 teaspoon vanilla
  • 1 cup flour, sifted
  • 6 ounces package of semi-sweet chocolate chips
  • 1/2 cup chopped nuts, if desired

INSTRUCTIONS

Cream shortening, sugars, egg and vanilla. Slowly add flour and then fold in chocolate chips and nuts. Drop dough by the heaping tablespoon on to a parchment lined baking sheet. Cook at 375 for 10 – 12 minutes. Cookies will be done when the edges become slightly golden brown. Remove from cookie sheet immediately and let cool on a wire rack.

NOTES

These are old-fashioned cookies that will bake flat and crispy (akin to the Tate’s brand) instead of thick and cakey (Crumbl, for example).

We prefer our cookies slightly underbaked, golden crispy edges with a soft, chewy center. This is around the 8-10 minute mark with most ovens. Once removed from the oven, I finish the warm cookies with a sprinkle of Maldon flake salt for the satisfying, salty crunch!

Feel free to experiment … and don’t forget a tall glass of milk.

Have a favorite chocolate chip cookie recipe? Please share!

Quick & Easy No-Knead Bread Recipe

Quick & easy, this no-knead bread recipe can get a hot & tasty homemade loaf on the table in no time!

Recipe Highlight: The recipe link below has recipe for both a quick rise (2 hours) and overnight rise (12 to 18 hours). I have included my tweaked version of the quick rise recipe, but please head over to Gimme Some Oven’s website for detailed instructions for both original versions.


LINK: https://www.gimmesomeoven.com/no-knead-bread/


INGREDIENTS:

  • 3-1/4 cups (430 grams) of All Purpose flour
  • 2 teaspoons kosher salt
  • 1 teaspoon honey or granulated sugar
  • 1 packet (7 grams) of active dry yeast
  • 1-1/2 cups warm water (about 110 degrees) — or more, as needed. Depends on how thirsty your flour brand is. Trader Joe’s AP tends to need more water. Check the link above for a picture of how it should look at the dough stage.

INSTRUCTIONS:

  1. Mix the dough. Stir the dry ingredients together in a large bowl until combined. Add in the warm water and stir with a spatula until the dough is mixed. Please note: The dough will be loose and sticky with some scraggly bits! As mentioned in the ingredients list, it may need more water depending on the brand/type of flour used.
  2. Let the dough rise. Let the dough rest at room temperature for 2 hours or until the dough has doubled. See notes section for some proofing tips!
  3. Shape the dough: Transfer to a well-floured surface, folding the dough on top of itself by pulling the outer edges up and into the center a few times until the dough holds its shape & forms a round dough ball. Lightly flower the top of the dough ball and then carefully flip it upside-down onto a peice of parchment paper. The smooth side should be on top. Use your hands to shape the ball into an even circle before lightly flouring the top of the dough ball before covering loosely with plastic wrap or a kitchen towel.
  4. Preheat the oven & Dutch Oven. Toss your Dutch oven inside cold oven (to avoid cracking enamel) and set to 450 degrees to pre-heat for about 30 minutes while allowing the bread ball to rest.
  5. Bake the bread. Transfer the dough ball via the parchment paper into the pre-heated Dutch oven. Be careful as the Dutch oven WILL BE HOT. Cover the Dutch oven with the lid and allow to bake for 30 minutes. At the 30-minute mark, carefully remove the lid and bake for an additional 10-20 minutes (depending on how crispy or golden brown you wish your loaf to be).
  6. Cool down. & serve Remove from the oven, and then carefully lift from the Dutch Oven using the edges of the parchment paper. Transfer to a wire rack, if available, and allow to cool at least 30 minutes before slicing.

NOTES:

You will have the best results if you allow your dough to rise in a warm environment. If you don’t have a proofing box, you can turn your oven on for a few minutes at a low heat to get it warm before turning off the oven and putting in your dough to rise. You can also just turn your oven light on. I have also seen it suggested that you use a space heater in a small room such as a laundry room on really cold days.

An additional tip I have come across regarding a blistering crust is to use a spray bottle with water and spritz on top of floured loaf right before putting into the oven.

The dough can also be used to make a focaccia-like dough. Just drizzle a little olive oil on top and start stippling with your fingertips, finishing with a sprinkling of flaked salt and additional toppings.

Time to get baking!

Create a website or blog at WordPress.com

Up ↑