Peanut Butter Buttons (Also: Peanut Butter Blossoms)

Original recipe can be found here: Peanut Butter Blossoms – Preppy Kitchen

INGREDIENTS

  • ¾ cup creamy peanut butter (188g)
  • ½ cup unsalted butter softened (113g)
  • ½ cup granulated sugar plus more for rolling (100g)
  • ½ cup packed light brown sugar (110g)
  • ¼ teaspoon salt
  • 1 large egg room temperature
  • 1 teaspoon vanilla extract
  • 1½ cups all-purpose flour (180g)
  • ½ teaspoon baking soda
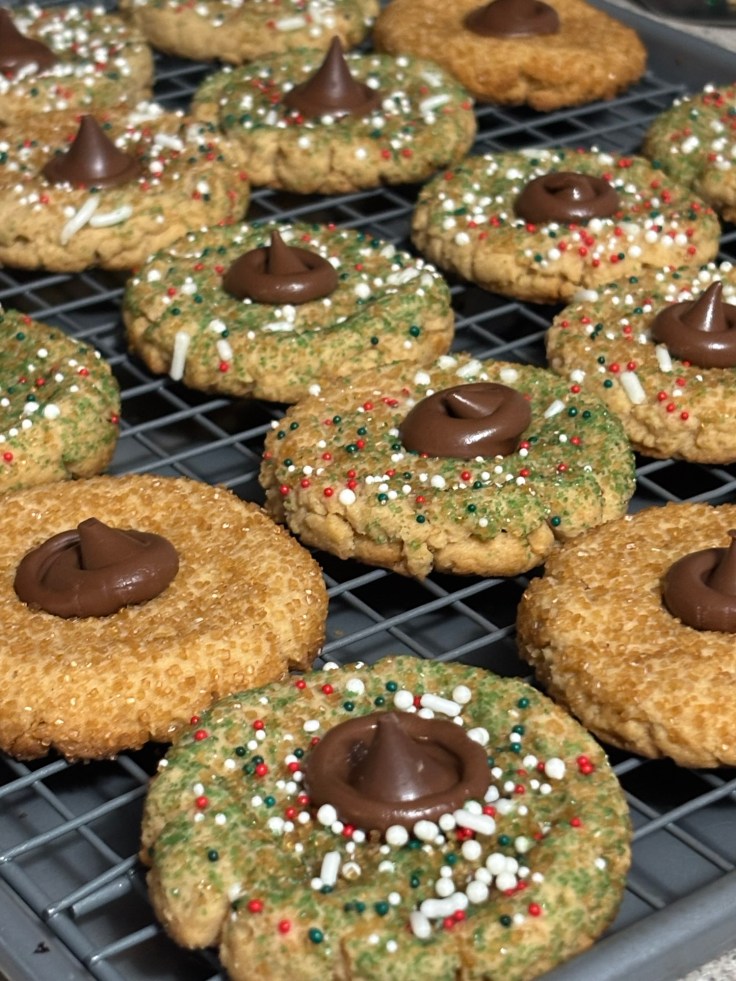
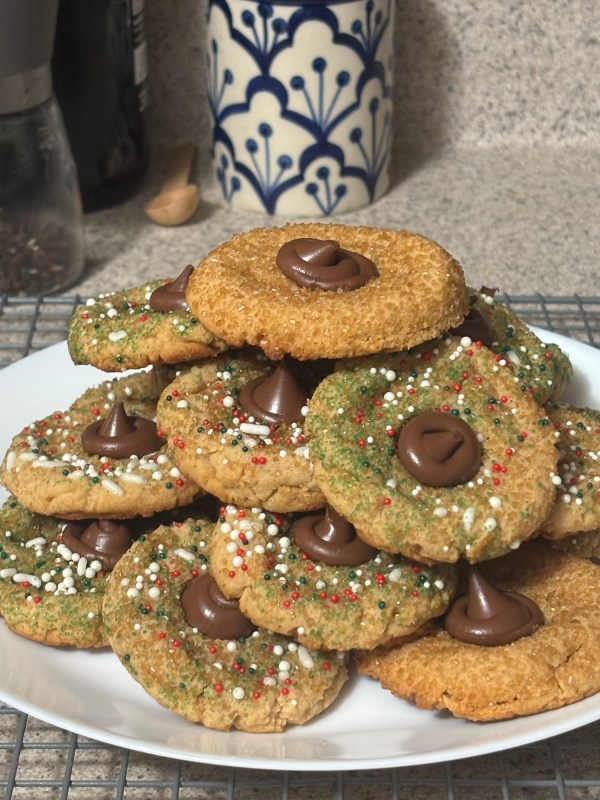
  • 36 Hersey’s chocolate kisses unwrapped (or miniature Reese’s PB cups for Peanut Butter Blossoms – see notes)

INSTRUCTIONS

  • Preheat the oven to 375°F. Line cookie sheets with parchment paper.
  • In a large mixing bowl or the bowl of a stand mixer fitted with the paddle attachment, combine the peanut butter, unsalted butter, sugars and salt. Cream together by beating on medium speed until well combined. Add the egg and vanilla. Beat until well combined. Scrape down the bowl. Add the flour and baking soda and beat on low speed just until combined.
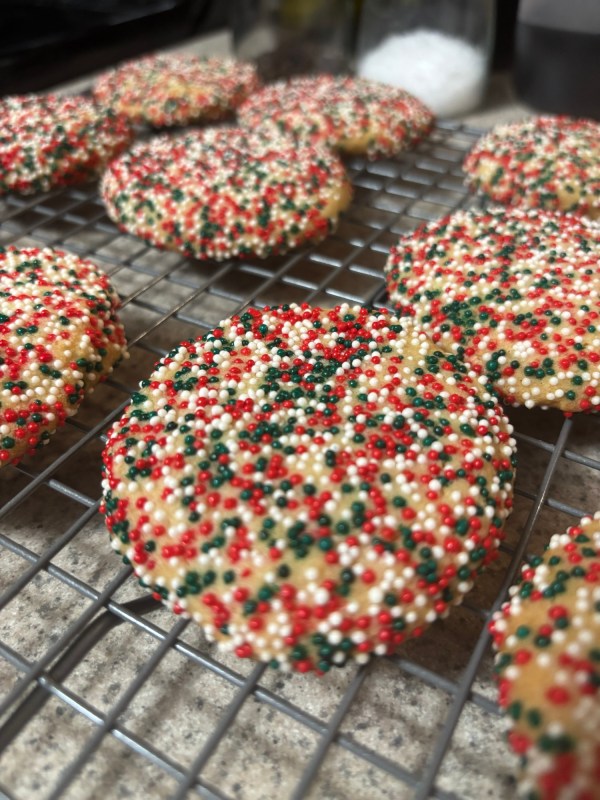
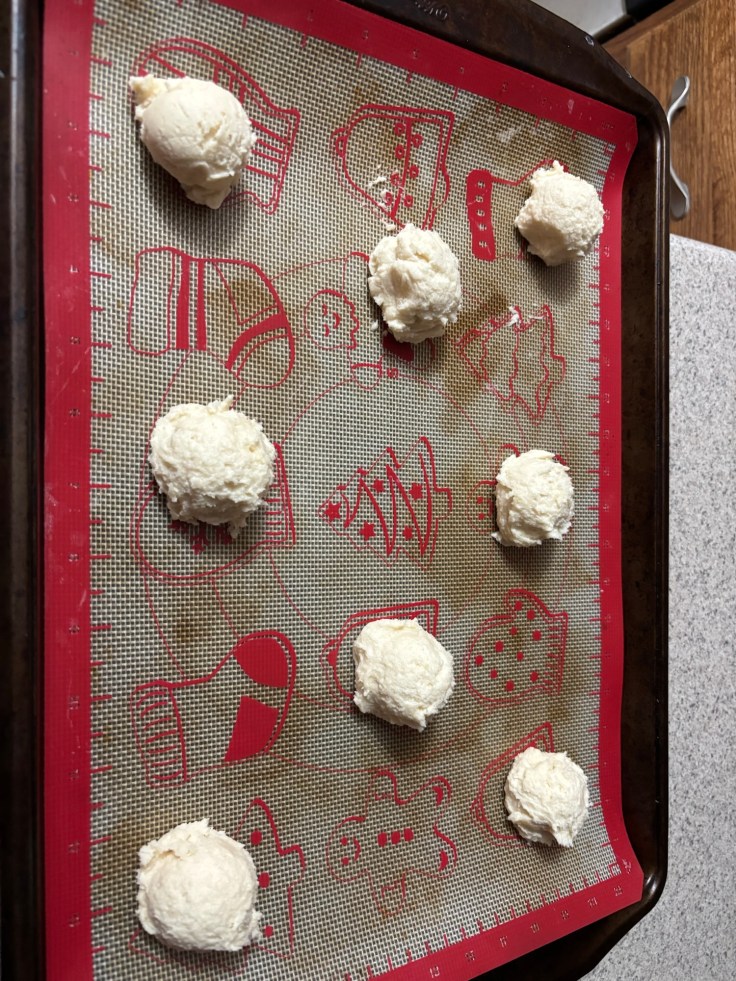
  • Scoop the dough and roll into 1-inch balls. Coat in additional granulated sugar if desired. Place on a prepared baking sheet 2 inches apart.
  • Bake for 8 to 10 minutes or until the cookies look puffy and cracked and the bottom just start to turn brown. Immediately press a chocolate kiss into the center of each cookie. (The cookies will crack and that’s okay!) Allow the cookies to cool completely on the pan, until the chocolate is set. Serve or store in an airtight container for up to 1 week.

NOTES

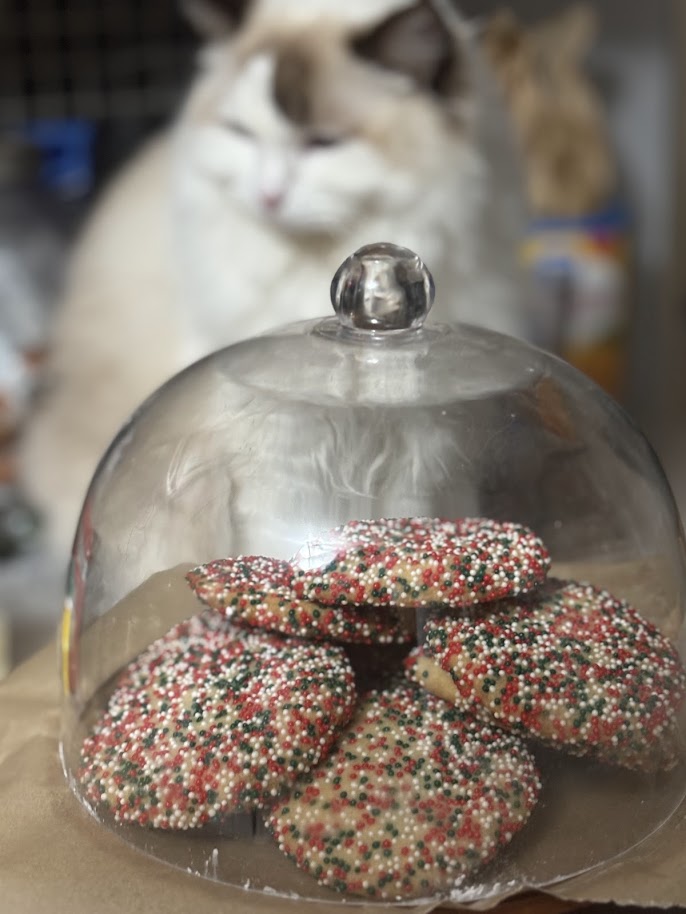
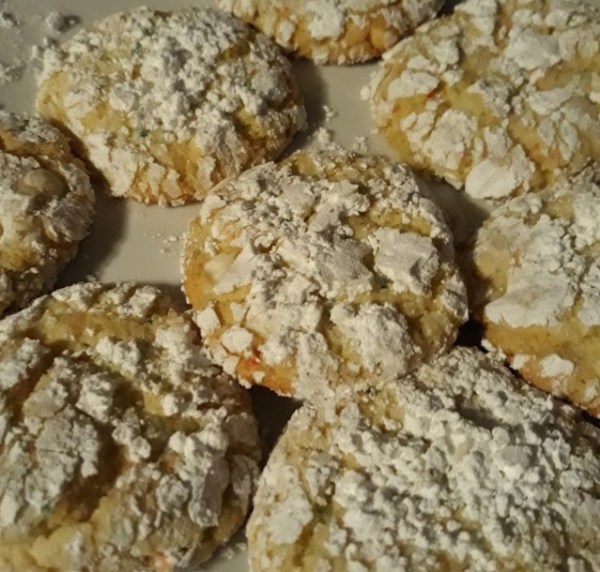
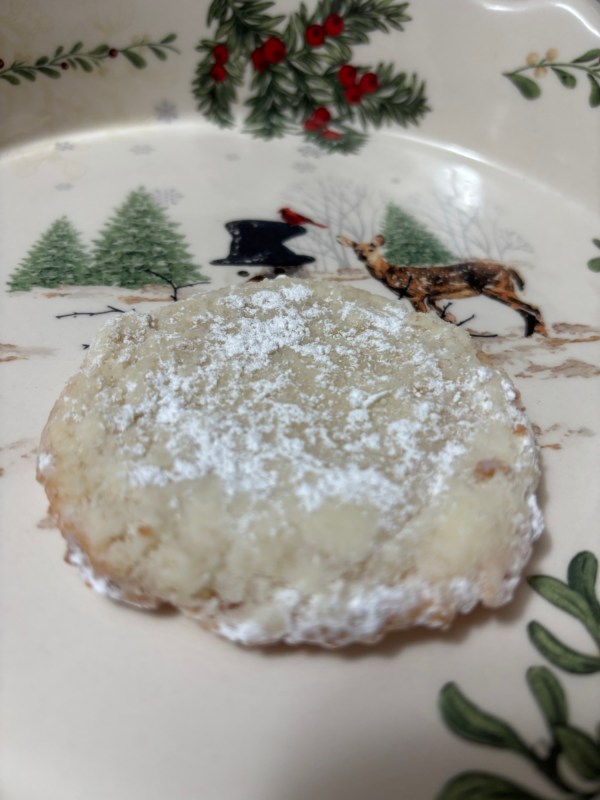
When making Peanut Butter Buttons, I like to press the tip of the Hershey Kiss into the cookie once slightly melted. This helps with stacking for storage. And while sprinkles are always a favorite for special occasions, my favorites will also be rolled in turbinado sugar instead.

And while I use this recipe primarily to make Peanut Butter Buttons, I also use the base recipe to make Peanut Butter Blossoms. For Blossoms, I press the prepared dough into mini muffin tins and bake about 10 minutes, until edges are lightly golden but still soft and gooey in center. Once out of the oven, I press unwrapped miniature Reese’s Peanut Butter Cups into the center of each cookie while still warm. Once cookies are cooled slightly and set, I remove the cookies from the muffin tins and allow to cool on a cooling rack. No matter which way you prepare this dough, it’s the perfect amount of peanutty sweetness!

Please visit the original recipe via the link provided at the top of the page or watch the video embedded below for additional information about this amazing recipe.


Mexican Sprinkle Cookies

INGREDIENTS

  • 1 cup of unsalted butter, softened
  • 3/4 cup sugar
  • 1/4 cup powdered sugar
  • 1/4 tsp salt
  • 1 tsp baking powder
  • 1 tsp baking soda
  • 1 egg
  • 1 tsp vanilla extract
  • 2.25 cups all-purpose flour
  • Sprinkles for the occasion

INSTRUCTIONS

  • Cream butter and sugars together in mixer.
  • Add salt, baking soda, and baking powder. Mix just to combine.
  • Add in your egg and vanilla. Mix just to combine.
  • Add in flour and mix in until combined.
  • Form dough balls and then chill dough in the fridge for at least 5 minutes.
  • Roll dough balls in sprinkles and place on baking sheet lined with parchment paper.
  • Bake in a 350 degree oven for 12 to 15 minutes.

NOTES

This recipe was discovered via TikTok. The original creator who shared this recipe is C’s Kitchen.


Snowball Cookies

INGREDIENTS

  • 1 cup butter, softened (2 sticks)
  • 2/3 cup powdered sugar
  • 2 tsp vanilla extract
  • 0.5 tsp almond extra
  • 2.25 cups all-purpose flour
  • 0.5 tsp salt
  • 2 tbsp cornstarch
  • 1/2 to 3/4 cups chopped pecans
  • Additional powdered sugar to coat cookies (about 1 cup)

INSTRUCTIONS

  • Whip together butter and powdered sugar until light and creamy.
  • Add vanilla and almond extracts to creamed mixture.
  • In another bowl, sift together your dry ingredients: AP flour, salt, cornstarch
  • Add your dry to your creamed ingredients in 3 parts.
  • Fold in your nuts.
  • Put combined dough into fridge for about 30 minutes.
  • Preheat oven to 350 degrees.
  • Once dough is chilled, use a small cookie scoop to place cookie dough balls onto 2 baking sheets lined with parchment paper. Allow at least an inch between cookie but know that they do not really spread. You can fit about 20 cookies on one baking sheet.
  • Bake cookies in preheated oven for about 10 minutes. Cookies will be very blonde. DO NOT TOUCH once removed from oven.
  • Allow cookies to cool for about 10 minutes.
  • Once slightly cooled, place cookies on a cooling rack to finish cooling off completely.
  • Once cookies are completely cooled, coat cookies in additional powdered sugar. Be gentle as they are delicate.
  • Enjoy!

NOTES

Original recipe discovered via TikTok: Angela Kay’s Kitchen. We called these Mexican Wedding Cookies while growing up. They are a fav!

Noah’s Yummy Ooey Gooey Bars

Recipe Highlight:  This is a quick & easy way to satisfy a sweet tooth. Noah makes his own mean version of these bad boys! This is my take on this popular homemade treat that’s sure to please even the most discerning tastebud at the family gathering.

Makes 9 x 13-inch pan of bars.

INGREDIENTS

Crust:

  • box of cake mix (I use French vanilla)
  • 1/2 cup of melted butter (1 stick)
  • 2 eggs
  • vanilla extract to taste

Filling

  • 8 ounces cream cheese (1 block)
  • 2 eggs
  • vanilla extract to taste
  • 4 cups powdered confectioner’s sugar

INSTRUCTIONS

  1. Heat oven to 350 degrees.
  2. Melt butter.
  3. Add your box of cake mix to the melted butter and mix in eggs & vanilla to form a crust mixture.
  4. Press crust mixture into a 9 x 13-inch pan.
  5. In a separate bowl, cream together softened cream cheese (room temperature) with eggs & vanilla. Once mixed, slowly incorporate the powdered sugar, one cup at a time. This will be your topping mixture.
  6. Pour the topping mixture over the crust mixture.
  7. Place into your preheated oven, cooking for 35 to 40 minutes. When done, the middle will be softly set and the top of the bars will have a crinkled texture.
  8. Cool completely before eating.

NOTES

Kiddos: I love you so much! Please feel free to make this your own! I normally use the French vanilla cake mix, but the original calls for yellow cake mix … and lemon or strawberry would be fantastic as well! We always enjoyed putting them in the fridge once cooled as it transforms the topping! No matter how you enjoy them, know I’m thinking of you!

Grandma’s Strawberry Crunch Cake

This is one of our traditional Christmas desserts, one that we’ve had every Christmas as long as I can remember. I even made sure to whip this up while we were in Boston, miles and miles away from our extended family back in Mississippi. It was comforting to share that little piece of home and helped me cope with missing them so very much during the holidays.

I post this here because I think I may be the last of my family to have this recipe. Someone had told me that my grandmother had lost it, and it would break my heart to lose this traditional family favorite.

It’s simple. And beautiful. This red and white delight is a lovely finishing touch to any holiday or spring table. I do hope you’ll try it when you can spare the calories.

INGREDIENTS

Crust:

  • 2 sticks of butter, melted
  • 2 cups of flour
  • 2 cups pecans
  • 2 Tbsp sugar
  • A pinch of salt if using AP flour, optional


FILLING:

  • 2 packages cream cheese, softened
  • 3 cups powdered sugar
  • Box of Dream Whip (located near Jello in baking supplies aisle)
  • 1 can strawberry filling

INSTRUCTIONS

For crust: Place butter into baking dish and melt in a 350-degree oven. Add flour, nuts, and sugar to melted butter, forming a dough. Press the dough into the pan to form a crust and bake in pre-heated oven until golden. Cool.

For filling: Cream together softened cream cheese and powdered sugar. Prepare box of Dream Whip per box instructions (see notes below). Fold Dream Whip into cream cheese mixture. Pour combined mixture into cooled crust and top with strawberries before refrigerating.

Refrigerate for at least 4 hours before serving.

NOTES

Grandma’s recipe just states “box of dream whip”, but the box comes in 2 envelopes. Use both.


Double Chocolate Small Batch Muffins

*I have a lower calorie version here, which we actually enjoy even more, but that may be because of our diet brains!

INGREDIENTS

  • 140 grams all purpose flour
  • 1 tsp baking powder
  • 1/4 tsp baking soda
  • 40 g of sifted cocoa powder
  • pinch of salt
  • 90 grams (1/2 cup) brown sugar
  • 60 ml (1/4 cup) vegetable oil
  • 1 tsp vanilla extract
  • 1 large egg
  • 120 ml (1/2 cup) whole milk
  • 75 g (1/2 cup) chocolate chips … plus more for decorating tops, if desired.

INSTRUCTIONS

  • Preheat oven to 350 degrees.
  • Place 6 liners in muffin tin, alternating cups to leave a cup between each muffin if possible.
  • In a large mixing bowl, sift together flour, cocoa, baking powder and baking soda.
  • Add salt, sugar, oil, vanilla, egg, and milk to dry ingredients and stir until combined. Try not to overmix.
  • Stir in chocolate chips.
  • Fill 6 lined muffin tins with mixture, overfilling to achieve a bakery-style muffin.
  • Dot top with additional chocolate chips (I love using chocolate chunks on top or chopped pieces of quality chocolate bars).
  • Bake in oven at 350 degrees for 18 minutes until risen & domed.

NOTES

Makes 6 bakery style muffins. If not sweet enough for your taste, add 2 heaping tablespoons of granulated sugar in addition to the brown sugar. However, I find these perfect as they are for my tastes. The chocolate flavor is deep and rich, akin to a lava cake or brownie.

French Vanilla Crinkle Cookies

INGREDIENTS

  • French Vanilla box cake mix (or cake mix of your choice)
  • 1/3 cup neutral oil
  • 2 eggs, slightly beaten
  • powdered sugar to roll cookies in for crinkle texture

INSTRUCTIONS

  • Preheat your oven to 350°F (175°C) and line a baking sheet with parchment paper.
  • In a mixing bowl, combine the red velvet cake mix, eggs, and vegetable oil. Stir until a thick dough forms. Chill the dough for about 15-30 minutes to make it easier to handle.
  • Using a cookie scoop or your hands, form the dough into balls (about 1 inch in diameter). Roll each ball in powdered sugar until fully coated. For a better crinkle effect, roll them twice in powdered sugar.
  • Place the cookie balls on the prepared baking sheet, spacing them about 2 inches apart. Bake for 10 to 12 minutes, or until the edges are set but the centers are still soft. The cookies will continue to firm up as they cool.
  • Cool and Enjoy: Allow the cookies to cool on the baking sheet for a few minutes before transferring them to a wire rack to cool completely. Enjoy your delicious red velvet crinkle cookies!

NOTES

These are just typical cake mix cookies, and any flavor cake mix will do. The cake flavor in the preview image is birthday cake flavored, for example. However, there’s something special about using the French Vanilla box mix for these treats. It provides almost a cheesecake-like flavor that is our favorite. Enjoy!

Lacey Almond Thin Cookie Recipe

I originally found this recipe listed as Wedding Cookies, but the results were not what I normally associate as such. These cookies more closely resemble a lacey Almond Thin. I feel like the original recipe author perhaps forgot an ingredient when posting (an egg, maybe?), but the results were these rich, thin cookies that became my favorite contribution to the Christmas cookie season.

Let the baking madness that is a hallmark of Christmas begin!

Also: These are AMAZING cold. I’m talking straight-out-of-the-freezer cold! Trust me on this one …

INGREDIENTS

  • 1 cup sugar
  • 1/2 cup butter, softened
  • 3 ounces of cream cheese
  • 1 teaspoon vanilla
  • 1/8 teaspoon almond extract
  • 1 cup flour
  • pinch of salt

INSTRUCTIONS

  • Cream together the first 5 ingredients.
  • Fold the flour and pinch of salt into the creamed mixture.
  • Place dough into fridge to chill for 30 minutes while heating oven to 350 degrees.
  • Using a small cookie scoop, place 8 dough balls evenly spaced onto ungreased cookie sheet.
  • Place cookies into a 350-degree oven for 14-18 minutes (or until golden brown).
  • Cookies will be spread when cooking and become VERY delicate. They are done when edges are lacey and golden brown. I like the edges very lacey and messy as the crunch is spectacular.
  • Allow to cool almost completely before coating with powdered sugar.
  • Store cooled cookies in fridge (or freezer!) until serving.

This recipe makes about 16 cookies.

Preppy Kitchen’s Delicious Cream Puffs

Recipe highlight: The following is copy/pasted from Preppy Kitchen’s Blog and Youtube tutorials for posterity’s sake. There is invaluable additional information regarding this complicated recipe that can be found by clicking on the provided links. Please check out the original recipe for the best results!

Ingredients

Pastry Cream:

  • 1½ cups whole milk (360mL)
  • 1½ cups heavy cream (360mL), divided
  • 1 vanilla bean split and seeds scraped
  • ⅔ cup granulated sugar (133g)
  • ¼ cup cornstarch (30g)
  • ¼ teaspoon salt
  • 6 large egg yolks
  • 1 tablespoon cold unsalted butter

Puffs (Choux Pastry):

  • 1 cup water (240mL)
  • ½ cup unsalted butter (113g)
  • 1½ tablespoons granulated sugar
  • ½ teaspoon salt
  • 1 cup all-purpose flour (120g)
  • 3 to 4 large eggs
  • confectioner’s sugar for dusting

Instructions

For the Filling:

  • Combine the milk, ½ cup cream, and scraped vanilla seeds in a medium pot and place on medium-high heat whisking occasionally. Bring to a boil and immediately turn off the heat and set aside.
  • In a large bowl, whisk the sugar, cornstarch, and salt together then add the egg yolks. Whisk until pale yellow and smooth. While whisking, slowly pour in ½ cup of the hot milk mixture until incorporated. Whisk in the remaining hot milk mixture. Pour the mixture through a strainer back into the saucepan.
  • Cook the egg yolk mixture over medium-high heat, whisking constantly, until thickened and just starting to bubble. The whisk should leave a defined trace when moved through the custard. Remove from the heat and whisk in the butter until fully melted and combined. Transfer the custard to a large bowl.
  • Cover with plastic wrap, lightly pressing the plastic against the surface to prevent a skin from forming. Chill for at least 2 hours or until ready to serve. The custard can be made up to 2 days in advance.

For the Choux Pastry:

  • Preheat the oven to 425F. Line a large sheet pan with parchment paper.
  • In a large saucepan, bring the water, butter, sugar, and salt to a boil over medium-high heat. When it boils, immediately take the pan off the heat.
  • Add all of the flour at once and stir hard with a wooden spoon until all of the flour is incorporated. Return to medium heat and cook, stirring for about 60 seconds.
  • Scrape the mixture into the bowl of a stand mixer fitted with a paddle attachment (you can also use a hand mixer). Beat at medium speed for about 2 minutes to cool the mixture down. (it will still be warm.)
  • With the mixer running, add 3 eggs, one at a time, stopping to scrape down the sides of the bowl between each egg. Mix until the dough is smooth and glossy and the eggs are completely incorporated. The dough should be thick but fall slowly and steadily from the beater when lifted out of the bowl. If the dough is still clinging to the beater, add the remaining 1 egg and mix until incorporated.
  • Transfer the dough to a pastry bag fitted with a large round tip and pipe dollops roughly 2 inches in diameter and 1 inch high. Lightly wet a finger and tap down the spike on top. (For additional color during baking, you can brush the tops of the dough lightly with an egg wash.)
  • Bake for about 20 minutes or until the dough is golden brown and appears dry. (Try not to open the oven door during the bake.) Remove the baking sheet from the oven. Carefully poke holes in the side of each puff by inserting the tip of a small knife about halfway into the puff. Return to the oven and bake for another 3 minutes. Remove and let cool completely on the baking sheet. (You can turn the oven off and leave the puffs in the oven with the door cracked open after baking if you’d like them to really dry out.)

For the Assembly:

  • Place the remaining 1 cup cold cream from the filling in a large bowl and beat until stiff peaks form. Remove the custard from the fridge and whisk it to break it up and smooth the texture out. Fold the whipped cream into the custard. Transfer the filling to a piping bag fitted with a star tip
  • Cut the tops of the cooled puffs off with a serrated knife. You can scoop out some of the softer strands inside, if desired. Pipe the cream filling into each pastry then place the cap on, and lightly dust with confectioners’ sugar. Cream puffs are best if enjoyed within a few hours of assembly. Any leftovers can be stored in the fridge in an airtight container for up to 2 days.

Notes

I am STILL trying to perfect this dessert despite it being a family favorite. It is a must-have for my brother’s birthday! And of all the recipes for creme puffs, Preppy Kitchen’s version is definitely my favorite to date!

However, for nostalgia’s sake, I am including a picture of the recipe that my mother used to make creme puffs. The version in the images below was included in a recipe book that was lovingly put together by one of my sisters for all of my siblings after my mother’s passing. While the recipe from Preppy Kitchen is an elevated version, mom’s version is and always will be near and dear to my heart.

Christmas Toffee Bark

INGREDIENTS

  • 1 C butter
  • 1 C brown sugar, packed
  • 2 C chocolate morsels (milk chocolate, semi-sweet, dark … your choice!)
  • 40 saltine crackers (or cracker of your choice … including graham crackers of pretzels!)
  • Topping of your choice, optional (Example: nuts, sprinkles, flaked sea salt)

INSTRUCTIONS

  • Line jelly roll pan with foil. Spray foil with nonstick spray. Lay crackers flat onto foil-covered pan.
  • Cook butter and brown sugar for 6-10 minutes before pouring over crackers.
  • Bake in a 350 oven for 8-10 minutes or until caramel mixture is bubbly.
  • Remove from oven and let sit for 3-5 minutes. Sprinkle chocolate chips on top of and let melt for about 5 minutes. Chocolate morsels will be shiny and soft when ready to spread. Immediately sprinkle the topping of your choice, if desired.

REVIEW

So rich and addictive. You simply cannot tell that crackers are used as the crunchy base for this bark. Totally amazing for an easy holiday treat. A favorite year after year …

For my kiddos: Link to a similar recipe that includes a video in case you have any questions when making this tasty treat: https://www.littlesweetbaker.com/christmas-crack-saltine-cracker-toffee/

MERRY CHRISTMAS!

Create a website or blog at WordPress.com

Up ↑